Deploying a Black Duck AMI on AWS
Table of Contents
Launching the Black Duck AMI on AWS
To deploy a Black Duck AMI on Amazon Web Services (AWS), do the following steps:
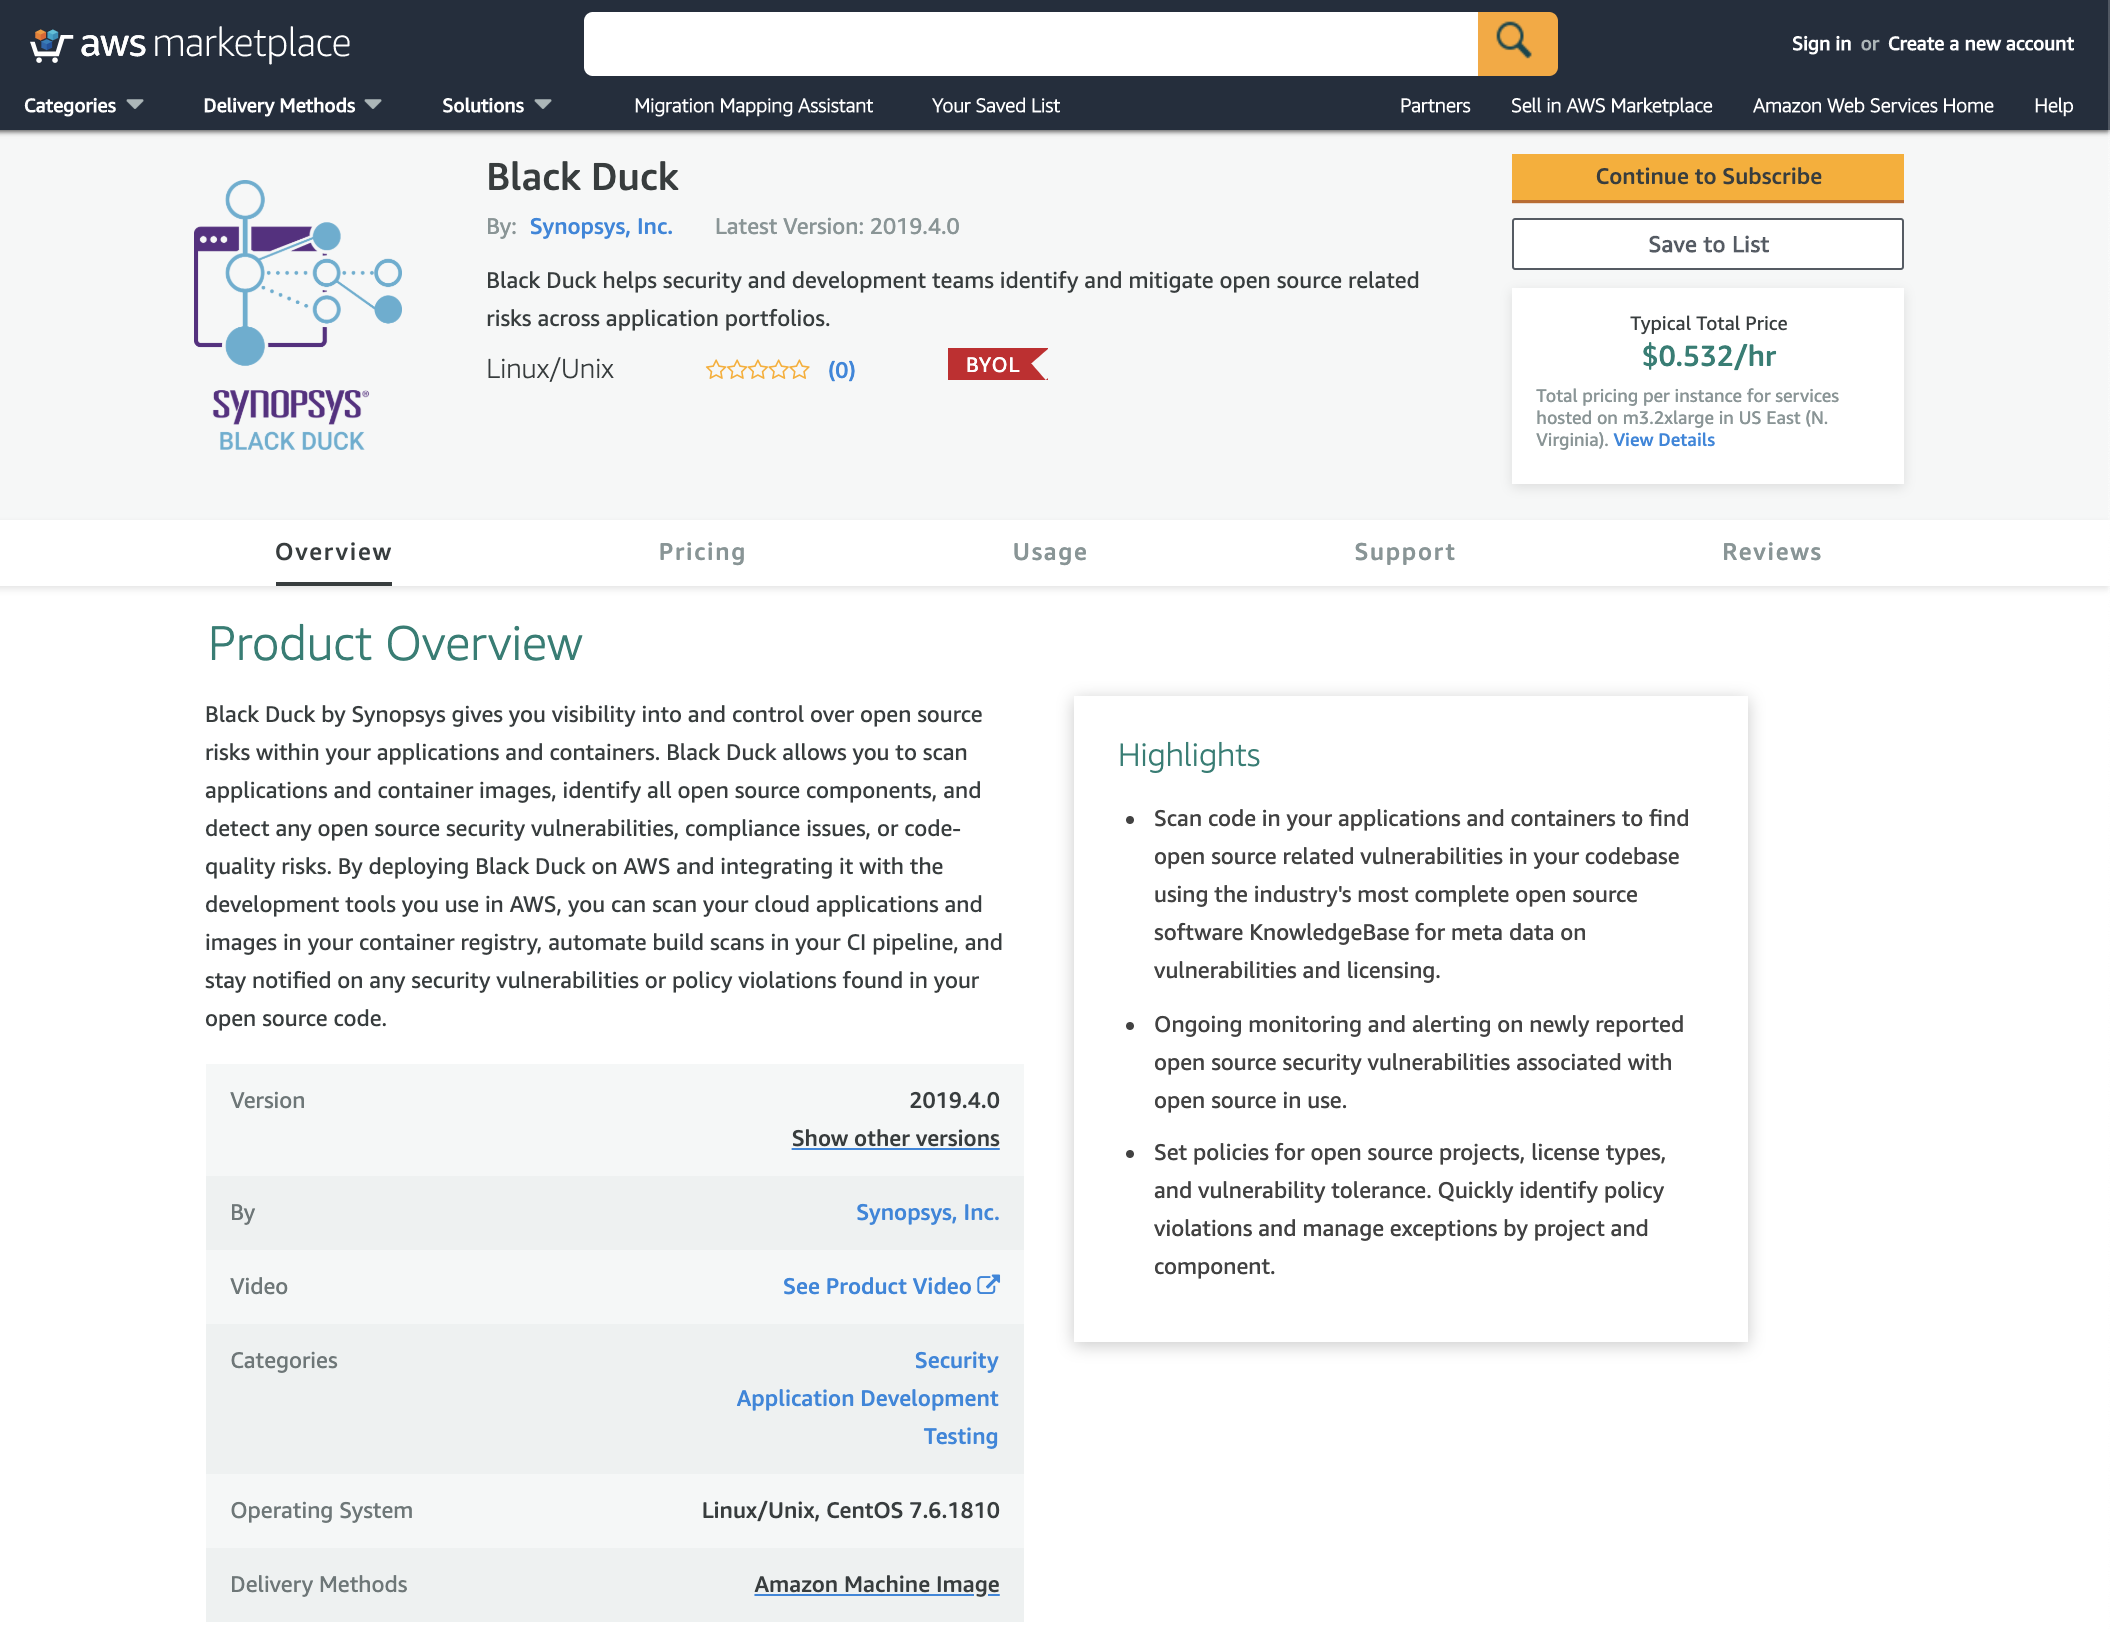
- Click AWS Marketplace to open AWS in a web browser.
- Search for Black Duck.
- On the search results page, click Black Duck.
- Click Continue to Subscribe.
- Click Continue to Configuration.
Verify that the appropriate Region is populated, and then click Continue to Launch.
On the configuration page, the latest software version, and your last-used region are prepopulated.For best performance, deploy Black Duck in that same region that you run Development workloads (CI/CD) on AWS.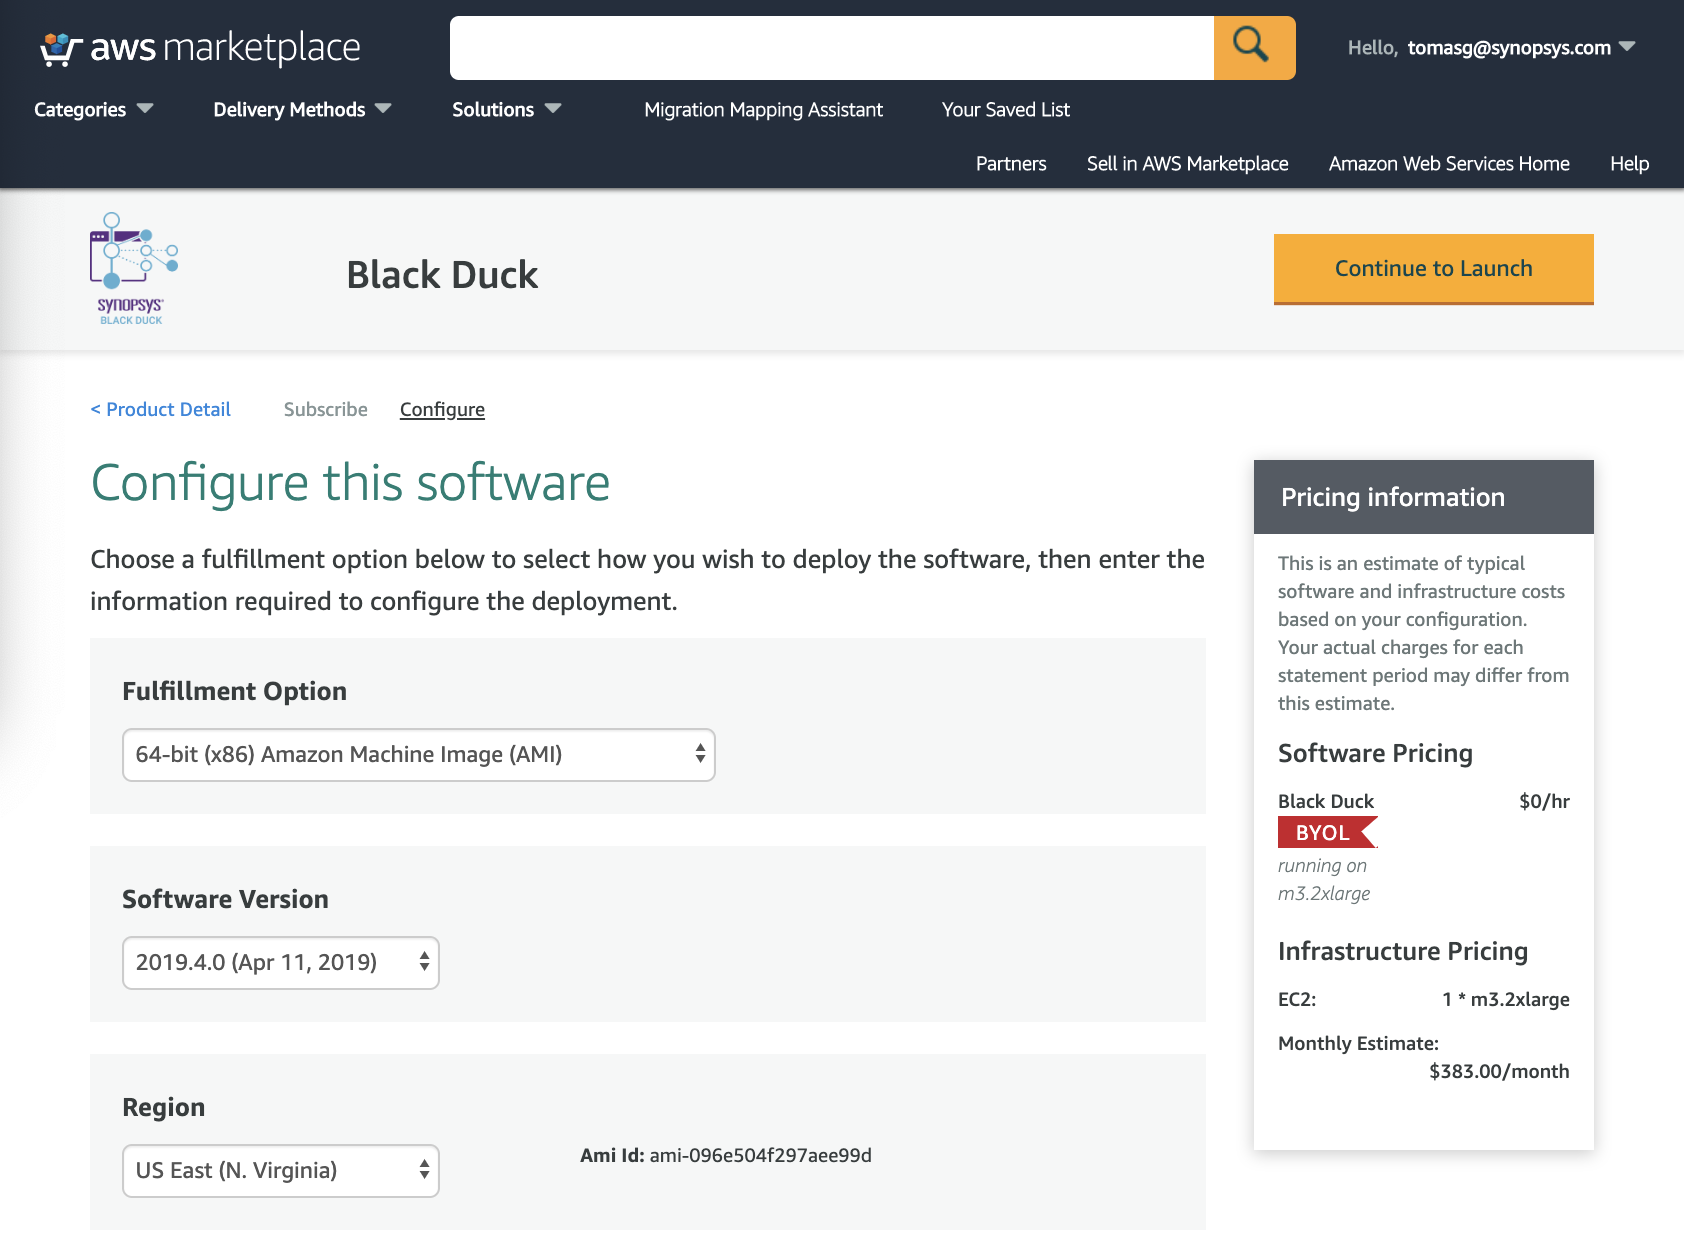
- On the Launch this software page, verify that Launch from Website is selected under the Choose Action drop-down list.
- Select the EC2 Instance Type.
The default instance type is m3.2xlarge, which represents the minimum requirements for running Black Duck. Select the VPC and subnet that you use to deploy Black Duck.
You must configure internet access or add a route so that Black Duck can communicate with Synopsys Detect and the Black Duck KnowledgeBase.When you invoke Black Duck from a CI system such as Jenkins or CodePipeline in AWS,
ensure that the VPC and subnet where Black Duck is deployed can communicate with the VPC and Subnet
where the CI is running.
If your CI is external to AWS, ensure that the VPC and Subnet are accessible from where the CI system is running.Select an existing Security Group or click Create New Based on Seller Settings to create a new security group.
The following ports must be open when you create a new security group:
- Port 443: talks to Synopsys Detect (for scanning) and the Black Duck KnowledgeBase
- Port 55436: used for Black Duck Reporting DB
- Port 22: used for SSH admin access to the Instance, which you can close after the setup is complete.
Select the EC2 instance Key Pair that you want to associate with your instance, and then click Launch.
Black Duck is installed on this instance by using Docker Compose. Refer to the Docker Compose installation documentation on Github.
It might take several minutes for the Docker containers to start.
Logging in to Black Duck
- Locate the Instance in your EC2 Console > Instances page.
To connect to Black Duck, copy the public DNS prefixed by https into your browser URL bar.
The result is formatted like the following URL:A certificate trust warning might display when you load the site because the web server container has a self-signed certificate from Docker.
For now, it's safe to ignore that warning and go to Black Duck; Synopsys recommends that you replace this certificate with a custom certificate.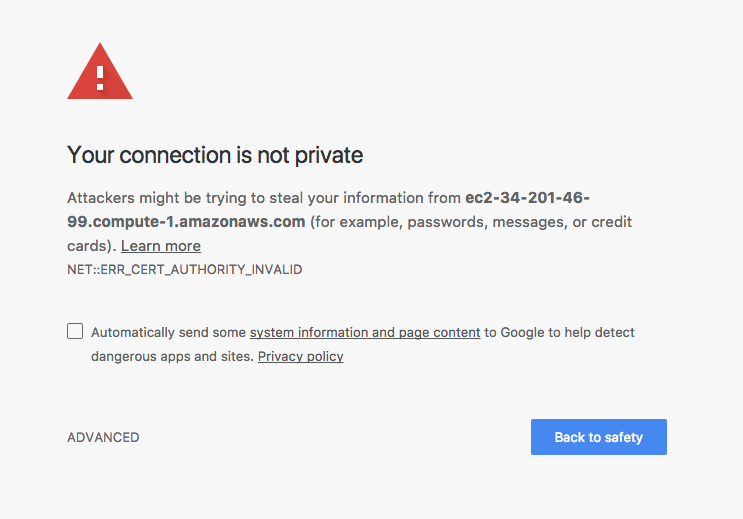
Instructions to replace the certificate are in the Docker Compose Installation Document.
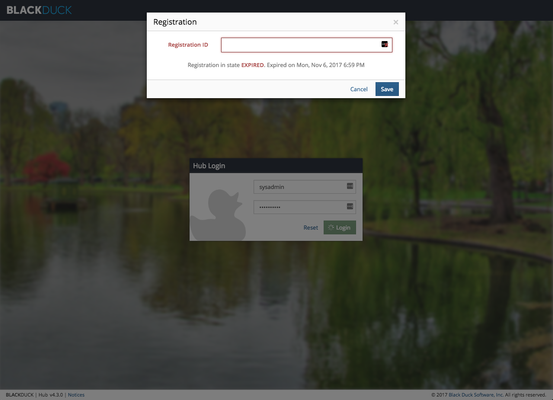
In the main login page, log in to Black Duck.
The default username is sysadmin.
The default password is blackduck.Reset the temporary sysadmin password to increase security.
If Black Duck is inaccessible, contact support@blackducksoftware.com.
Activating your registration license (BYOL)
Black Duck Hub on AWS uses the bring your own license model (BYOL) and is available to customers who have valid licenses.
If you do not have a license, contact our sales team to request a license.
When you type the administrator user name and password, a Registration dialog displays, where you can input your Black Duck Hub subscription license in the Registration ID field.
Upgrading Black Duck on AWS AMI
Docker Compose is used to install Black Duck on AWS AMI instances.
To upgrade your AWS AMI Hub instance, refer to the Black Duck Docker Compose installation guide, and follow the steps that are described in the following topics:
- Upgrading Black Duck
- Upgrading from an existing Docker architecture
©2020 Synopsys, Inc. All Rights Reserved