Calling Synopsys Detect from AWS CodePipeline using a custom action
Table of Contents
Introduction
Amazon Web Services (AWS) CodePipeline is a set of CI/CD (Continuous Integration / Continuous Delivery) cloud-based services that orchestrates the building, testing, and deployment of your applications.
With AWS CodePipeline, you can model, visualize, and automate the steps required to release your software.
Synopsys's integration with AWS Code Pipeline provides a method to automatically build any application using AWS CodeBuild, and the ability to invoke a Black Duck scan for open source vulnerabilities by using Synopsys Detect.
AWS CodePipeline enables custom actions that can be leveraged to simplify the integration of Synopsys software into AWS CodePipeline.
This document describes how to configure an AWS CodePipeline custom action to initiate a Synopsys Detect scan after a build of either:
- AWS CodeBuild projects
or - non-CodeBuild projects built on a particular S3 bucket path
The procedure described on this page achieves a result that is similar to the Synopsys Detect AWS CodeBuild integration procedure, but with a simpler configuration.
By using AWS CodePipeline custom actions, you are not required to edit each CodeBuild project's source code (buildspec.yml) to initiate a scan.
Scan Target Types
The following types of files can be scanned by Synopsys Detect when invoked by an AWS CodePipeline custom action:
- Fat JARs (JAR files containing all dependencies).
- WAR or TAR files containing all dependencies.
- Docker Images in any Docker registry, including the Amazon EC2 Container Registry (ECR).
Private Docker registries are not supported.
Configuring the custom action
Click AWS Parameter Store configuration and follow the steps to configure the Black Duck instance information in the AWS Parameter Store.
Use the same Parameter Store names that are used in the instructions, so that the following steps work for you.
- Create the Black Duck Scan CodePipeline custom action.
- Download the custom action JSON file (BlackDuckScanCustomAction.json) from aws-codepipeline-custom-action Black Duck GitHub repository to your local machine.
Alternatively, you can clone the whole repository to your machine. - You can edit the provider and version fields, but do not modify configurationProperties.
Execute the following AWS CodePipeline create-custom-action-type command to create the custom action.
aws codepipeline create-custom-action-type --cli-input-json file://BlackDuckScanCustomAction.json
- Download the custom action JSON file (BlackDuckScanCustomAction.json) from aws-codepipeline-custom-action Black Duck GitHub repository to your local machine.
- Create the required IAM policies.
Go to IAM > Policies, and create a policy to transfer files to and from the S3 bucket.
This enables the worker to pull build artifacts from the bucket for scanning and publishes the Black Duck risk report to the S3 bucket.Be sure to specify the S3 bucket in which your build artifacts are stored.
If you are using CodeStar, the output bucket is restricted to CodeStar workers by policies. Create a new bucket and use its name for the <codebuild-output-bucket>.{ "Version": "2012-10-17", "Statement": [ { "Effect": "Allow", "Action": "s3:ListBucket", "Resource": [ "arn:aws:s3:::<codebuild-output-bucket>/*", "arn:aws:s3:::<codebuild-output-bucket>" ] }, { "Effect": "Allow", "Action": [ "s3:PutObject", "s3:GetObject", "s3:DeleteObject" ], "Resource": "arn:aws:s3:::<codebuild-output-bucket>/*" } ] }- Locate the bucket in S3, then create a policy as follows:
The bucket name is as follows:
codepipeline-<region>-<random number>For CodeStar, the bucket name is as follows:
aws-codestar-<region>-<account-number>-<project-name>-pipeAWS CodePipeline creates a bucket on the fly for development artifacts.
{
    "Version": "2012-10-17",
    "Statement": [
        {
            "Action": [
                "s3:ListAllMyBuckets"
            ],
            "Effect": "Allow",
            "Resource": "*"
        },
        {
            "Action": [
                "s3:PutObject",
                "s3:PutObjectAcl",
                "s3:GetObject",
                "s3:GetObjectAcl",
                "s3:DeleteObject",
                "s3:ListObject"
            ],
            "Effect": "Allow",
            "Resource": [
                "arn:aws:s3:::codepipeline-<S3 Region name>-<Random number generated by AWS>",
                "arn:aws:s3:::codepipeline-<S3 Region name>-<Random number generated by AWS>/*"
            ]
        }
    ]
}
If you use AWS ECR as the Docker registry, get a Docker-registered token.
Create the following policy, and attach it to the CodeBuild and CodePipeline role if applicable.{ "Version": "2012-10-17", "Statement": [ { "Effect": "Allow", "Action": [ "ecr:BatchCheckLayerAvailability", "ecr:BatchGetImage", "ecr:GetDownloadUrlForLayer", "ecr:GetAuthorizationToken" ], "Resource": "*" } ] }
- Create the Black Duck Scan job worker for custom actions.
A "job worker for custom actions" is required to poll AWS CodePipeline for requests for this custom action. The job worker executes the job and returns the status result to AWS CodePipeline.
To run the job worker in EC2, create an AWS EC2 instance and log in to that EC2 instance.
Execute the job worker locally or in EC2. For debugging and testing, it might be easier to run the worker locally. For more information, refer to the Custom Action documentation.- Execute aws configure and set the default output format to JSON.
Apply the Policies that you created to the user that you're using to authenticate AWS Configure. - Verify that the following commands are installed and functioning; If not, install the relevant packages:
- aws codebuild
- aws codepipeline
- jq
- Retrieve the job worker shell script (poll.sh) from the aws-codepipeline-custom-action Black Duck GitHub repository, and save it; either locally or to the EC2 instance, depending on the job worker's running location.
Execute the job worker shell script by using the following command:
./poll.sh "category=Test,owner=Custom,version=2,provider=BlackDuck"
The worker is now set up to listen to for requests from CodePipeline.
- Execute aws configure and set the default output format to JSON.
- Create or Edit a pipeline, and add the custom action as a Test stage.
- Navigate to Services > Developer Tools > CodePipeline > Create/Edit pipeline.
- Add the Black Duck scan Custom Action to your Pipeline as a Test Step, when you create the pipeline under Test > Test provider, and select Custom Blackduck.
- Configure the following values:
- Input Artifacts - The output artifact from the build step.
- Black Duck Project Name - The project name the scan is mapped to in the Black Duck user interface.
- Black Duck Project Version - The Black Duck project version. Leave blank when you want to use a value generated by CodePipeline.
- S3 Bucket Name - The S3 bucket where the Black Duck risk report is published. This can also be the S3 bucket where the application was built to.
- S3 Bucket Region - The Region where the S3 bucket is located.
- ECR Region Name - When using ECR, specify the AWS ECR region where images are pulled from.
Image Name - If scanning a Docker image, specify the complete URI of the image to pull and scan. Leave blank when you're not scanning Docker Images.
To scan AWS CodeBuild output artifacts; for example, TAR, WAR, or JAR files, ensure that the input artifact name is the same as the output artifact name.
To scan non-AWS CodeBuild output artifacts; for example, artifacts in an S3 bucket, or Docker images, leave the input artifact name blank.
- Click Save Pipeline Changes.
- Release the pipeline.
- Release the pipeline manually. Optionally, you can also release the pipeline when there are changes in the source code; in this case, the custom action build stage is executed.
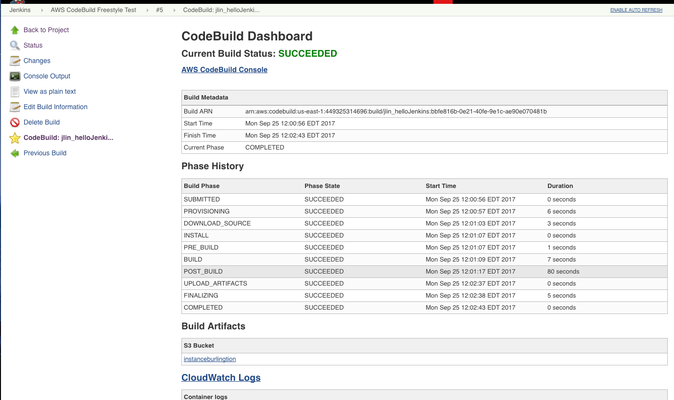
- After the build stage is complete, you can view the Black Duck risk profile report in S3 by clicking the BlackDuck or Details link.
- View the detailed Black Duck results by browsing to Black Duck.
Other Configuration Options
For other CodePipeline configuration options, refer to the following topics:
- Calling Synopsys Detect from AWS CodePipeline using the AWS command-line interface
- Calling Synopsys Detect from AWS CodePipeline using the AWS console UI
©2020 Synopsys, Inc. All Rights Reserved