To communicate with either Coverity on Polaris or Black Duck, Synopsys Detect must first authenticate.
To ensure that Synopsys Detect can authenticate, you must provide the appropriate URLs and access tokens.
While these values can be passed directly into Synopsys Detect at invocation time; this method is not recommended because the values are not encrypted, and therefore could be accessed improperly.
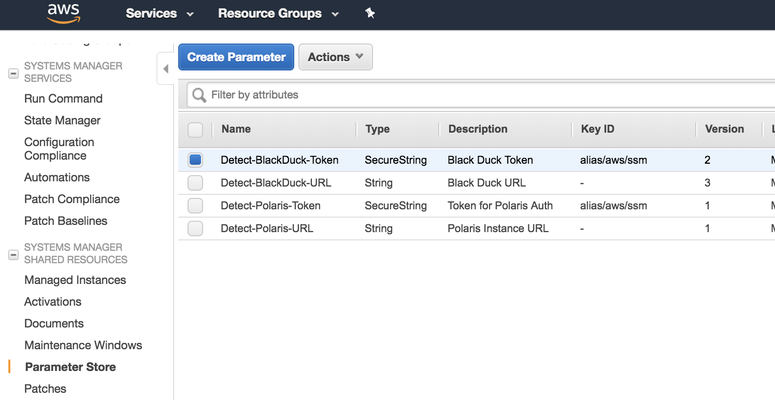
The more secure approach is to leverage the AWS Parameter Store to protect sensitive values and make them available to AWS CodeBuild and CodePipeline workers.
The following parameters are required:
- URL to your instance of Polaris/Black Duck
- The API Token to authenticate with Polaris/Black Duck
Although, user names and passwords can be used to authenticate to Black Duck, API authentication tokens are recommended for the following reasons:
- Tokens are more ephemeral than user accounts.
- Tokens provide more fine-grained access.
- Tokens cannot be used to access the Black Duck user interface.
Contact Synopsys Support for more information about the benefits of API Authentication Tokens over username/password authentication.
The following steps describe adding authentication parameters:
Add URL and tokens to the AWS Parameter Store
- Based on the product that you want to use, create the Access Token:
- Polaris:
- Log in to your instance of Polaris.
- Select your user name on the top left, then click Access Tokens > Create New Token.
- Black Duck
- Log in to your instance of Black Duck.
- Select your user name on the top right, then click Profile > User Access Token.
- Login to https://console.aws.amazon.com.
- Navigate to Services > Compute > EC2 > Systems Manager Shared Resources > Parameter Store > Create Parameter.
- Based on the product you connect to, create the following parameters:
Polaris:- Detect-Polaris-URL - Type: string
- Detect-Polaris-Token - Type: SecureStringBlack Duck:
- If you are scanning Docker Images in External Registries using Black Duck, then create these parameters:
- Detect-Registry-URL - Type: string
- Detect-Registry-Username - Type: string

- Detect-Registry-Password - Type: SecureString. Select the default KMS Key ID
Create a Policy in IAM to access the parameters
If you are using a CodeBuild worker to call Synopsys Detect, then you must create a policy in IAM to allow access to the parameters that you added in the previous step.
- Login to https://console.aws.amazon.com.
- Navigate to Services > Security, Identity & Compliances > IAM > Policies > Create Policy.
- Under Create Policy, use your preferred method for creating a Policy:
- Click Review Policy, then give a Name and Description to the Policy.
- Click Create Policy.
