Use the following options to integrate Coverity into an ADO pipeline:
All-in-one Script
Add a traditional BAC script as a task in a job under ADO.
Individual Tasks
Split each BAC step into separate tasks in a job under ADO.
A Task Group
Construct a template of tasks with variables as inputs that can be added directly to the job.
Pipeline YAML file
CI as code, where the steps are specified in a YAML file, committed to SCM and called from the source repository.
Using a script
This method uses an all-in-one script to do the Coverity BAC as a single task.
Create a New Pipeline.
Enter Source Repository.
Use Empty Job Template.
Add Task to Agent Job 1.
Under the Utility category, select and add a Command Line task.
Enter the following code into Command-Line task
Coverity BAC shell script
set COVHOST=localhost
set STREAM=hello-java
set IDIR=$(Build.SourcesDirectory)/idir
set AUTHKEY=C:/Tools/Coverity/Analysis/commit-authkey
set COVBIN=C:/Tools/Coverity/Analysis/2019.03/bin

%COVBIN%/cov-build --dir %IDIR% --fs-capture-search $(Build.SourcesDirectory) mvn -B clean package -DskipTests
%COVBIN%/cov-import-scm --dir %IDIR% --scm git
%COVBIN%/cov-analyze --dir %IDIR% --strip-path $(Build.SourcesDirectory) --all --enable-callgraph-metrics --webapp-security
%COVBIN%/cov-commit-defects --dir %IDIR% --host %COVHOST% --auth-key-file %AUTHKEY% --stream %STREAM% --description $(Build.BuildURI) --target Windows_x86_64 --version $(Build.SourceVersion) |
|

Using tasks
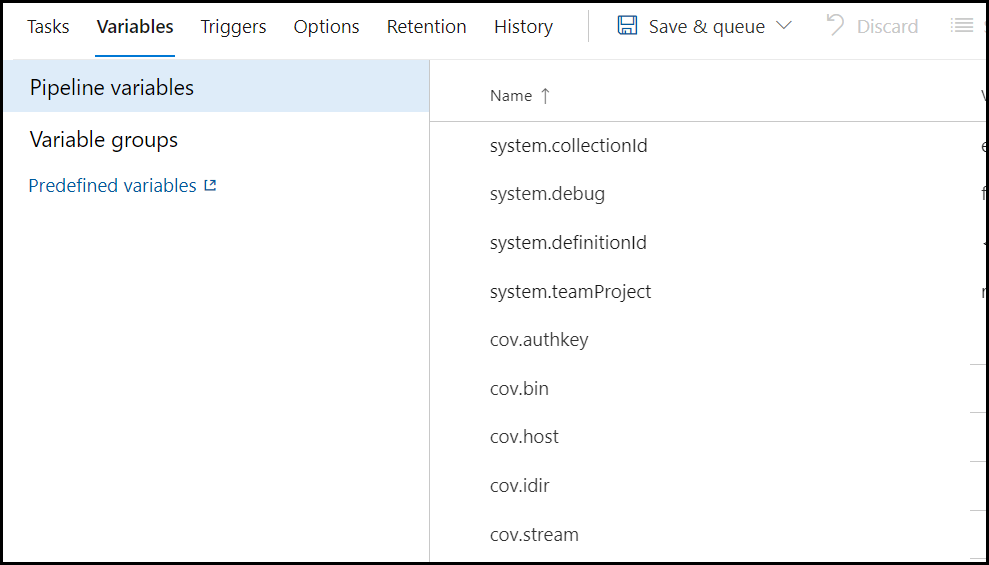
This method is similar to the all-in-one script but it breaks each step into separate tasks and uses variables:
Create a New Pipeline
Enter Source Repository
Use Empty Job Template
Add the following, Under the Variables tab:

Using a task group
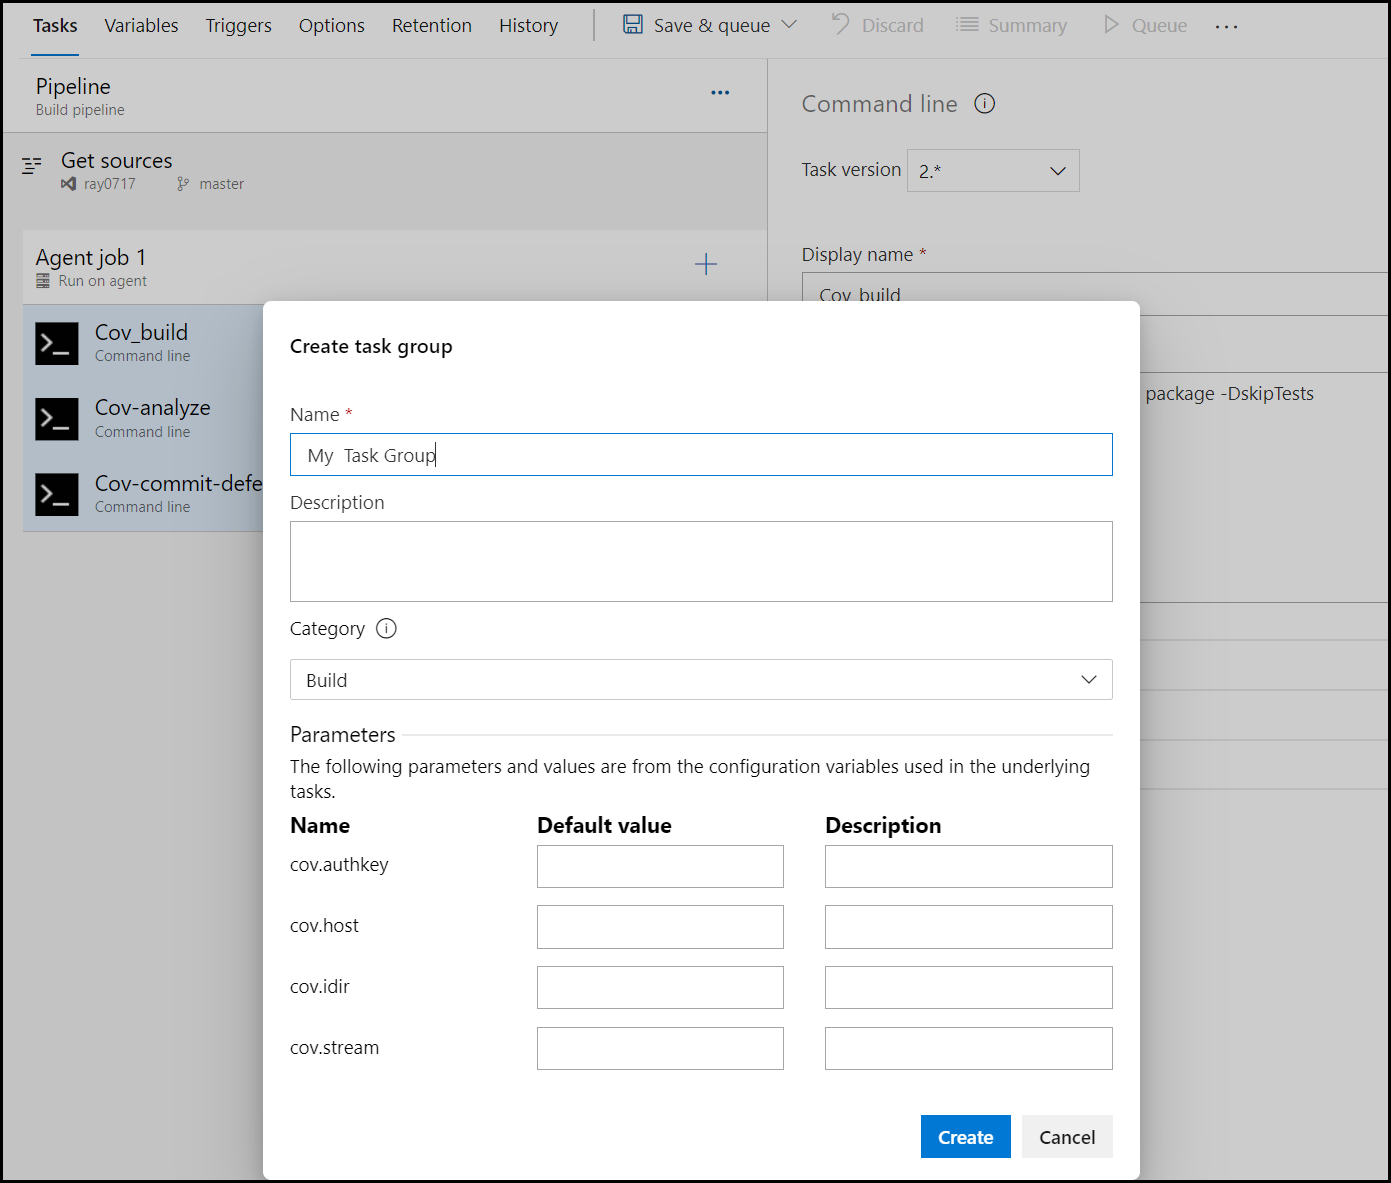
ADO Task Groups enable you to create a collections of tasks as per the above section, then save them as a single task group. A task group only exposes the user defined variables (with defaults) when the job runs.
A task group can be exported as a JSON file and imported into other build pipelines or ADO servers. This works well for reusing the same BAC recipe across lots of similar CI pipelines.
Reuse or recreate the 3-task Coverity BAC job from the previous section.
Select the three BAC tasks.
Right click and Create Task Group.
Any user defined variables will be presented for default values and description.
Once created, task groups will be available for modification and export under Pipelines > Task Groups.

Using a YAML file
To set up a YAML based Coverity BAC, commit the following to your repository and then create a new build pipeline, selecting configuration as code and coverity.yml as the YAML source.
Commit ADO YAML file (examples below) to project repo.
If using plugin, install plugin and configure service connection (see above).
Create a new pipeline ADO > Project > Pipelines > New Pipeline
Select Repo and Branch
Select "Use Existing YAML file"
Browse and select the YAML file

coverity.yaml
name: $(Date:yyyyMMdd).$(Rev:.r)
variables:
  cov.authkey: 'c:/tools/coverity/analysis/commit-authkey'
  cov.bin: 'c:/tools/coverity/analysis/2019.03/bin'
  cov.host: 'localhost'
  cov.idir: '$(Build.SourcesDirectory)/idir'
  cov.stream: 'hello-java'
jobs:
- job: Coverity
  pool:
    name: private-windows
  workspace:
    clean: all
  steps:
  - task: CmdLine@2
    displayName: cov-build
    inputs:
      script: '$(cov.bin)/cov-build --dir $(cov.idir) --fs-capture-search $(Build.SourcesDirectory) mvn -B clean package -DskipTests'
  - task: CmdLine@2
    displayName: cov-import-scm
    inputs:
      script: '$(cov.bin)/cov-import-scm --dir $(cov.idir) --scm git'
  - task: CmdLine@2
    displayName: cov-analyze
    inputs:
      script: '$(cov.bin)/cov-analyze --dir $(cov.idir) --strip-path $(Build.SourcesDirectory) --all --enable-callgraph-metrics --webapp-security'
  - task: CmdLine@2
    displayName: cov-commit-defects
    inputs:
script: '$(cov.bin)/cov-commit-defects --dir $(cov.idir) --host $(cov.host) --auth-key-file $(cov.authkey) --stream $(cov.stream) --description $(Build.BuildURI) --target Windows_x86_64 --version $(Build.SourceVersion)' |
|


